How to connect to a remote computer with Chrome Remote Desktop
Want to access a computer from another desktop or a mobile device? Google's Chrome Remote Desktop is a simple, fast and free way to make the connection.

Once upon a time, in a world not so far away, accessing a computerremotely required all sorts of costly, complicated software and technical know-how.
These days, it's a different story. Google's free Chrome Remote Desktopservice makes it dead-simple to get on any computer — Windows, Mac, Linux or Chromebook — from any other desktop or mobile device. You can access all of the remote system's contents and even click around as if you were sitting right in front of it.
Chrome Remote Desktop can be useful for signing onto your own personal or work computer from afar, and it can be equally valuable for peeking in on someone else's system — be it your co-worker's or your mom's — to provide hands-on help without having to be in the same location.
And best of all? Getting the service up and running is easy as can be. In fact, all you need to do is follow these three steps:
Step 1: Install Chrome Remote Desktop on the host computer
Open up the Chrome browser on the computer you want to access remotely (or download and install Chrome, if you're using a Windows, Mac or Linux system that doesn't already have it). In Chrome, go to the Chrome Remote Desktop app in the Chrome Web Store, click the Add to Chrome button, click "Add app," and then click the Chrome Remote Desktop icon that appears on your screen (alongside other app icons) to launch it.
(In the future, you can find the icon by typing chrome:apps into the browser's address bar on Windows, Mac and Linux systems — or, if you want even easier access, right-click or Ctrl-click the icon and follow the prompts to create a system-level shortcut. If you're using a Chromebook, meanwhile, just look for the Chrome Remote Desktop icon in your regular app launcher.)
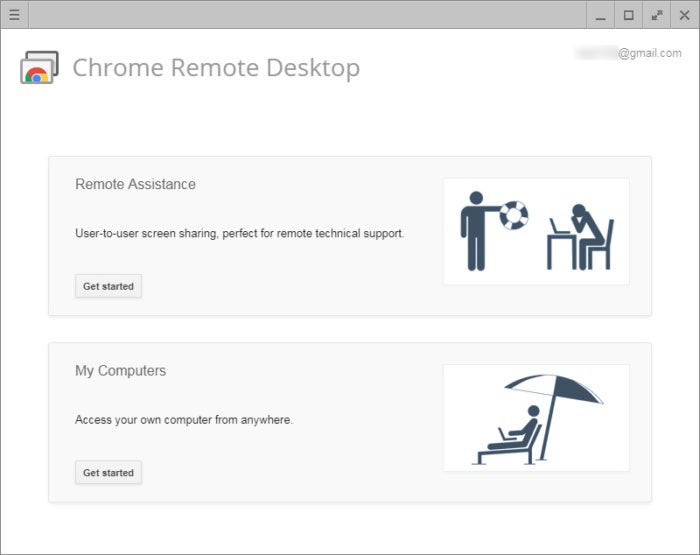
The first time you open the app, it'll ask you to grant it permission to view your computer and manage chat messages. Click "Allow." The app's main screen will then present you with two options: setting the app up for someone else to access your computer for remote assistance or setting it up for your own personal remote sign-ins.
Select whichever option you want. On Windows, Mac or Linux systems, you'll then be prompted to download and install a secondary desktop host application (something that isn't required on Chromebooks). Follow those prompts and complete the installation, if necessary.
Step 2: Prepare Chrome Remote Desktop for a remote connection
Take a deep breath: The setup process is mostly finished. And you'll only have to complete that first step the first time you set up a new computer for remote access; after that, you'll just open the Chrome Remote Desktop app, select the type of connection you want and then jump right to this point.
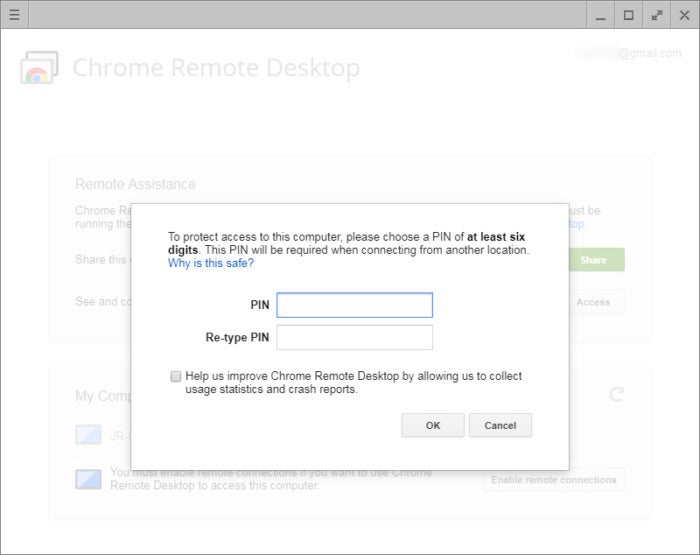
With the app opened and your connection type selected, you're almost all set for your remote access session. If you opted to share your system for someone else's remote assistance, you'll see a 12-digit code appear on the screen. If you chose to configure your computer for your own personal remote access, you'll have the opportunity to create a custom PIN.
Either way, those are the numbers you — or whomever — will need to get onto the desktop from another device.
With a remote assistance connection, you'll need to leave the Chrome Remote Desktop app open and running in order for someone else to be able to connect. With a personal remote access connection, you can go ahead and close the app once your PIN is set; as long as your computer is on and Chrome itself is running in the background (which it generally always is by default), the system will be standing by and ready for you to hop in anytime. Just note that you may have to visit your computer's power management settings to make sure the PC doesn't go to sleep — even if the display shuts off.
If you ever want to disable personal remote connections, either open the Remote Desktop app and click the "Disable remote connections" button or just uninstall the app entirely.
Step 3: Make the connection
At this point, you're ready to connect! All you need is the same Chrome Remote Desktop app mentioned above on any other desktop computer or the Chrome Remote Desktop mobile app on an Android or iOS device.
The desktop app will let you access your own personal connections as well as anyone else's remote assistance connections. For the former, you'll need to be signed into your Google account and also know the PIN you set a moment ago; for the latter, you'll just need to know the 12-digit code for that specific connection.
The mobile apps, meanwhile, work only with your own personal connections. You'll again need to be signed into your Google account and will have to input your PIN before such a connection can be made.
Using Chrome Remote Desktop from a computer is fairly self-explanatory: You just click and type in the app as if you were using the remote system directly.
From the mobile apps, you'll rely on your fingers to control the remote system. You can pinch to zoom in or out on the desktop or use two fingers together to scroll up or down. With the Android app you can swipe downward with three fingers to pull up a toolbar that lets you move between an on-screen keyboard input, a tap-based touch input and a mouse-like trackpad input; with the iOS app the toolbar is always onscreen.
With the trackpad input activated, you can left-click by tapping the screen with a single finger, right-click by tapping with two fingers together and middle-click by tapping with three fingers together. Granted, it isn't the most elegant way to get around a computer — and you probably won't want to do it for an extended period of time — but it can be handy for quick-hit tasks like restarting your system from afar or grabbing a file you forgot to save to the cloud.
And that's pretty much it! Not even remotely difficult to master — right?


Comments
Post a Comment