Android file transfer: How to move data between your phone and computer
Moving files from your Android device to a Windows PC or Mac (and vice versa) doesn't have to be difficult -- or dependent on any cloud services.

Your smartphone is a powerful computer in your pocket — and with Android, part of that PC-like muscle means being able to plug your phone into any Windows or Mac system and drag and drop files either way.
Unlike iPhones, Android devices allow you to access their file systems directly, without the need for any cumbersome interfaces or complicated procedures. In fact, transferring files to or from an Android device is basically no different than plugging an external hard drive into your computer and moving data to or from it.
All you need is your phone, your computer and a cable to connect 'em — with micro-USB or USB-C on the phone side and USB-A or USB-C on the computer side, depending on the specifics of your devices. (Most newer high-end Android phones use USB-C, whereas most pre-2016 devices and many current budget-level phones have the older micro-USB standard. USB-A, meanwhile, is the traditional connector port you're used to seeing on computers, while some newer models like Apple's latest MacBookshave USB-C.) There's a decent chance that the same cable that connects your phone to its wall charger will work.
Got it? Good. Here's what you need to do next, depending on whether you have a Windows or a Mac system:
Android file transfers for Windows computers
With Windows, things are as simple as can be. Just plug your phone into any open USB port on the computer, then turn on your phone's screen and unlock the device.
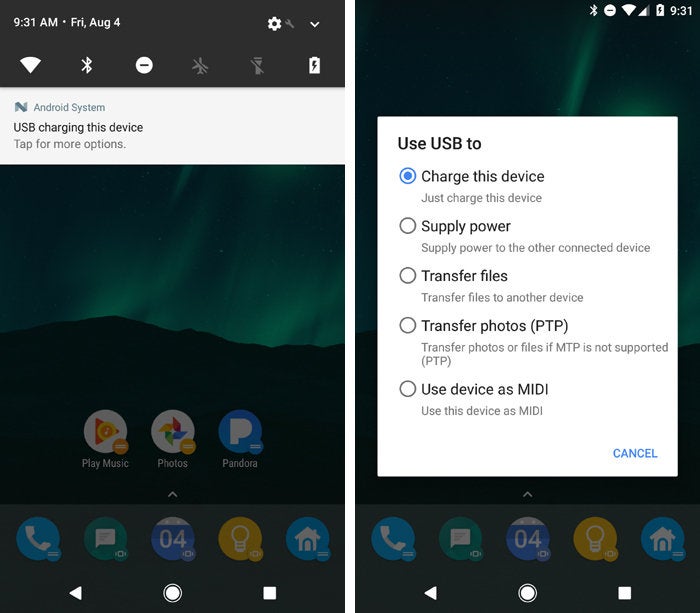
Swipe your finger down from the top of the screen, and you should see a notification about the current USB connection. At this point, it'll probably tell you your phone is connected only for charging.
Tap the notification and select "Transfer files" in the menu that appears. Now, on your desktop, open up a File Explorer window using the method that makes the most sense for your Windows configuration:
- click the File Explorer icon in your taskbar
- open the Start menu and click Computer
- click the Computer or My Computer icon on your desktop
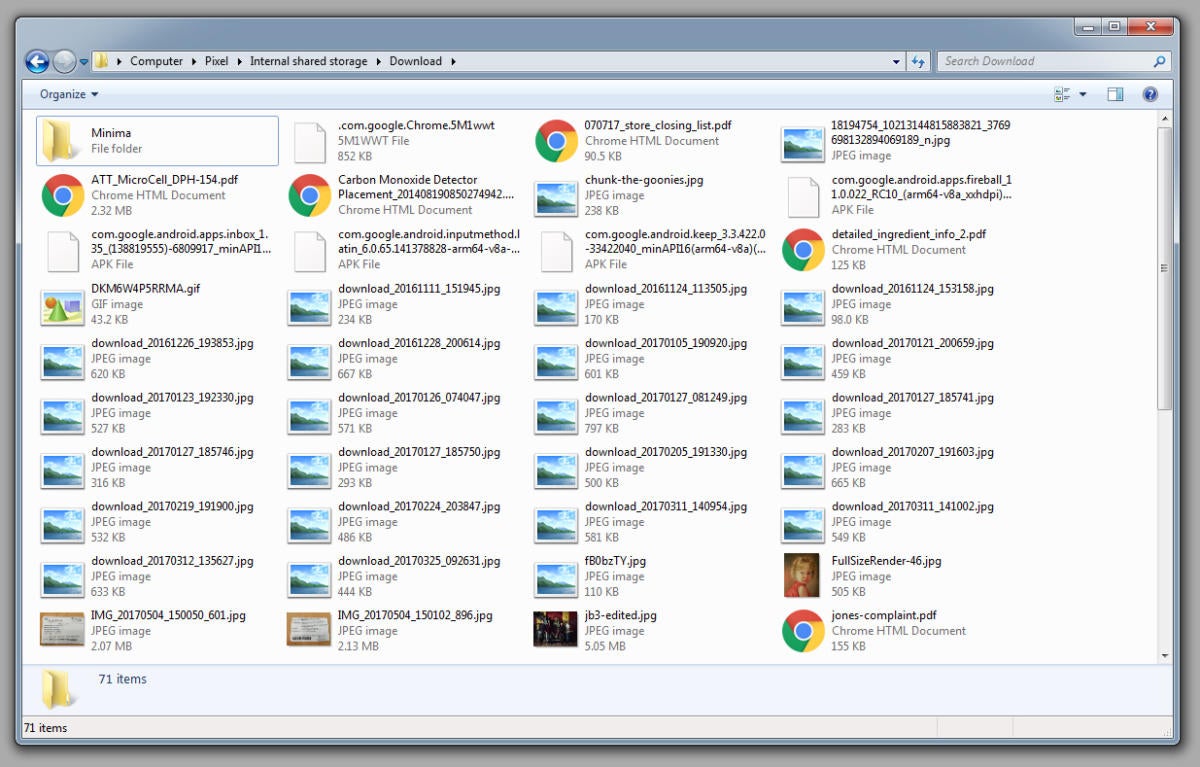
Then look for an icon representing your phone alongside other portable devices and drives. Click or double-click that icon, and ta-da! You're staring at your Android phone's internal storage. You can now click around and browse folders, drag and drop files between your phone and PC or manipulate the data in any way you want.

Android file transfers for Mac computers
Got a Mac? The Android file transfer process is a bit more complicated for you — but fear not, for it's still pretty darn easy.
The main difference is that before things will work, you'll need to download and install an official Google program called Android File Transfer. To use the program, your Mac must be running OS X 10.5 or later, and your Android device must have Android 3.0 or later -- something that should pretty much be a given with any reasonably recent Android product.
Once that's in place on your Mac, just plug your phone into your computer, turn on your phone's screen and unlock the device, and then look for the same USB status notification described above.
Tap the notification and select "Transfer files." The Android File Transfer program should then automatically open on your Mac, and you should be able to browse your phone's storage and transfer files to your heart's content.
Don’t like cables?
Hey, wait a minute — aren’t there apps and cloud services for this sort of thing? Sure there are, and we’ll cover them in a later article. When it’s published, we’ll add a link here.

Comments
Post a Comment